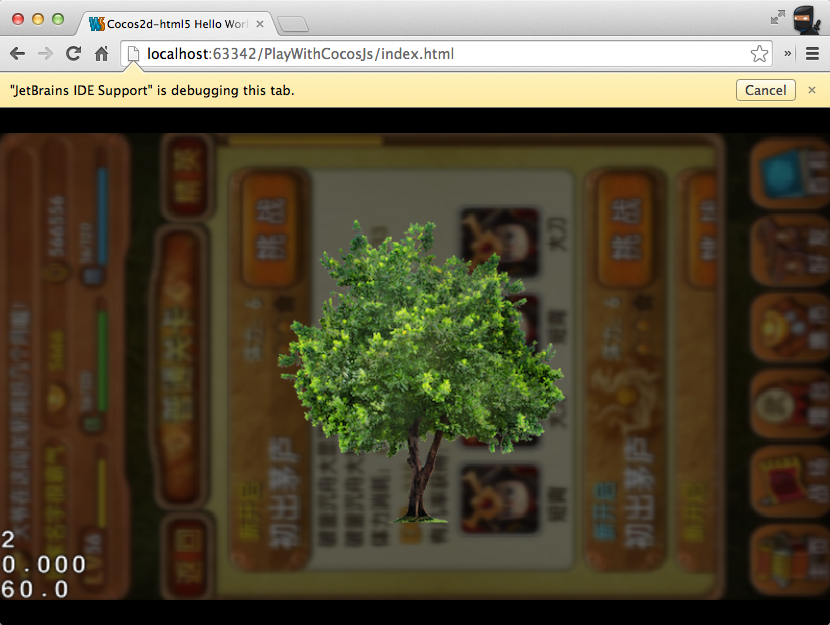
Cocos2d-js 实现弹窗背景虚化效果
美术组希望游戏中对话框的背景不是单调地叠一层半透明黑色,而是能有模糊的虚化效果。像是这个网页中第一个按钮按下去的样子。
显然,如果在要手游中实现这个效果,需要借助 OpenGL ES 2.0 Shader 来完成。
一个理想的方案是对当前场景设置一个 Shader 并在 Shader 中实现模糊效果,使得整个场景虚化。但是对话框也需要置于场景中,这会导致连对话框也虚化掉。
¶RenderTexture/FrameBuffer
不过好在现实也没有那么理想,在 Cocos2d 中直接对场景(CCScene)设置 Shader 是不起作用的。
一个变通的方法是将场景先绘制到缓冲区,然后再对缓冲区进行模糊。可以使用 cc.director.getRunningScene().visit(); 完成这一操作:
var bgTex = cc.RenderTexture.create(cc.visibleRect.width, cc.visibleRect.height);
bgTex.begin();
cc.director.getRunningScene().visit();
bgTex.end();
此时整个场景的‘截图’保存在了 bgTex 中。接下来只要对此截图进行模糊处理即可。
¶Software Blur
查阅了一些资料后,找到了一些备选的软模糊算法。
- StackBox Blur: Box Blur 的升级版,效果更好一些,而且速度是 Gaussian Blur 的 7 倍;
乍一看似乎 StackBox Blur 是较好的选择,但是从它源码上来看,它是最不容易实现的。所以我暂不考虑它了。我尝试了的 Box Blur 和 Gaussian Blur。
Box Blur 的效果过于生硬,而 Gaussian Blur 的效果好很多。
这里有一个简单的高斯模糊 Fragment Shader 的实现,不过只有9阶,在大半径的时候效果不够赞。所以我将其修改为15阶:
//apply blurring, using a 15-tap filter with predefined gaussian weights
sum += texture2D(CC_Texture0, vec2(tc.x - 7.0*blur*hstep, tc.y - 7.0*blur*vstep)) * 0.0044299121055113265;
sum += texture2D(CC_Texture0, vec2(tc.x - 6.0*blur*hstep, tc.y - 6.0*blur*vstep)) * 0.00895781211794;
sum += texture2D(CC_Texture0, vec2(tc.x - 5.0*blur*hstep, tc.y - 5.0*blur*vstep)) * 0.0215963866053;
sum += texture2D(CC_Texture0, vec2(tc.x - 4.0*blur*hstep, tc.y - 4.0*blur*vstep)) * 0.0443683338718;
sum += texture2D(CC_Texture0, vec2(tc.x - 3.0*blur*hstep, tc.y - 3.0*blur*vstep)) * 0.0776744219933;
sum += texture2D(CC_Texture0, vec2(tc.x - 2.0*blur*hstep, tc.y - 2.0*blur*vstep)) * 0.115876621105;
sum += texture2D(CC_Texture0, vec2(tc.x - 1.0*blur*hstep, tc.y - 1.0*blur*vstep)) * 0.147308056121;
sum += texture2D(CC_Texture0, vec2(tc.x, tc.y)) * 0.159576912161;
sum += texture2D(CC_Texture0, vec2(tc.x + 1.0*blur*hstep, tc.y + 1.0*blur*vstep)) * 0.147308056121;
sum += texture2D(CC_Texture0, vec2(tc.x + 2.0*blur*hstep, tc.y + 2.0*blur*vstep)) * 0.115876621105;
sum += texture2D(CC_Texture0, vec2(tc.x + 3.0*blur*hstep, tc.y + 3.0*blur*vstep)) * 0.0776744219933;
sum += texture2D(CC_Texture0, vec2(tc.x + 4.0*blur*hstep, tc.y + 4.0*blur*vstep)) * 0.0443683338718;
sum += texture2D(CC_Texture0, vec2(tc.x + 5.0*blur*hstep, tc.y + 5.0*blur*vstep)) * 0.0215963866053;
sum += texture2D(CC_Texture0, vec2(tc.x + 6.0*blur*hstep, tc.y + 6.0*blur*vstep)) * 0.00895781211794;
sum += texture2D(CC_Texture0, vec2(tc.x + 7.0*blur*hstep, tc.y + 7.0*blur*vstep)) * 0.0044299121055113265;
这是一组预算好的权重,节省计算量,这样就能省时省力达到满意的效果了。
需要注意的是,高斯模糊算法需要两次作用于图像。第一次对原图进行水平模糊,第二次对水平模糊后的图像进行垂直模糊。所以前面提到的缓冲区截图是非常必要的。
¶LayerBlur
由于绘制整个场景的过程是耗时的,且该效果只是用于对话框背景,所以缓冲区中的图像并不需要实时更新,创建后直接当作静态背景纹理使用即可。
为了便于使用,我将其封装为一个 Layer:
var modalBg = LayerBlur.create(LayerBlur.defaultBlurRadius, cc.color(0, 0, 0, 255 * 0.6));
this.addChild(modalBg);

本文例子在此开发环境中创建并测试通过:cocos2d-html5 3.0 alpha 2
源码已上传至 Gist
UPDATED 20140528
在 iOS 模拟器中测试没有通过:
- cocos2d-x 中须使用独立 shader,且需要使用两次 bgTex 缓冲区;
- cocos2d-x 在 visit() 渲染包含 ccui 的组件时,会产生奇怪的 bug 导致场景被色块覆盖。
UPDATED 20141031:
优化:An investigation of fast real-time GPU-based image blur algorithms
文章指出由于高斯模糊是一种低通滤波器,所以可以把图像缩小后使用低阶的高斯模糊滤镜后再以图像原来尺寸绘制到屏幕来达到优化的目的。